

Make a No-Sew Cuddle Blanket for one of the individuals living in our residential group homes following the directions below.
Take a video or picture of yourself making the blanket and share on social media tagging us at @incommunityga
Mail or to drop off your blanket at our main office:
InCommunity
3301 BUCKEYE RD, SUITE 700
ATLANTA, GA 30341
ATTN: Community Relations
Step 1: Choose the Fabric

Your blanket can be any size. Fleece comes 60-inches wide, so your blanket can be 60 x ??? We recommend 1 ½ yards for a lap blanket or 2 – 2 ½ for a larger one. Your finished product will be about 10-inches smaller than the fabric you start with. Choose fleece with a print and a contrasting or matching solid. I like to use strong, bold contrasts. You will need a solid and a print that are the same size. The sample uses a nice dark hunter green for the back.
Step 2: Line Up the Two Fabric Pieces

Line up the two fabrics, right sides OUT. Anti-pill solids are FUZZY on the right side. Anti-pill prints will be more distinct on the front side. Regular prints are hard to tell -- use the side that appeals to you.
Step 3: Trim to the Same Size

Trim the two pieces so that they are the same size.
Step 4: Cut Out the Corners
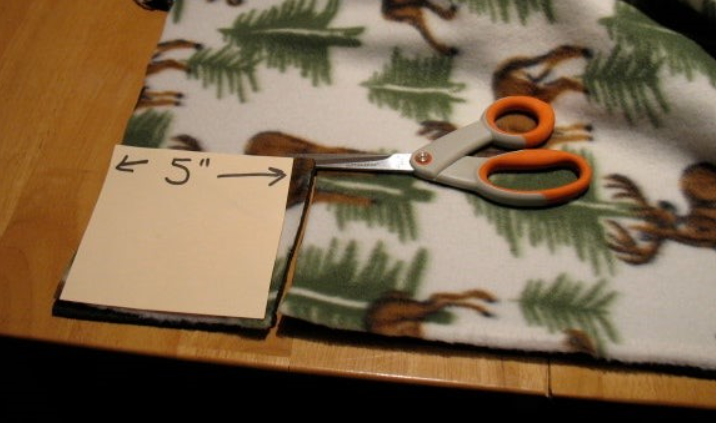
Cut a 5-inch square from each of the four corners.
Step 5: Cutting the Fringe
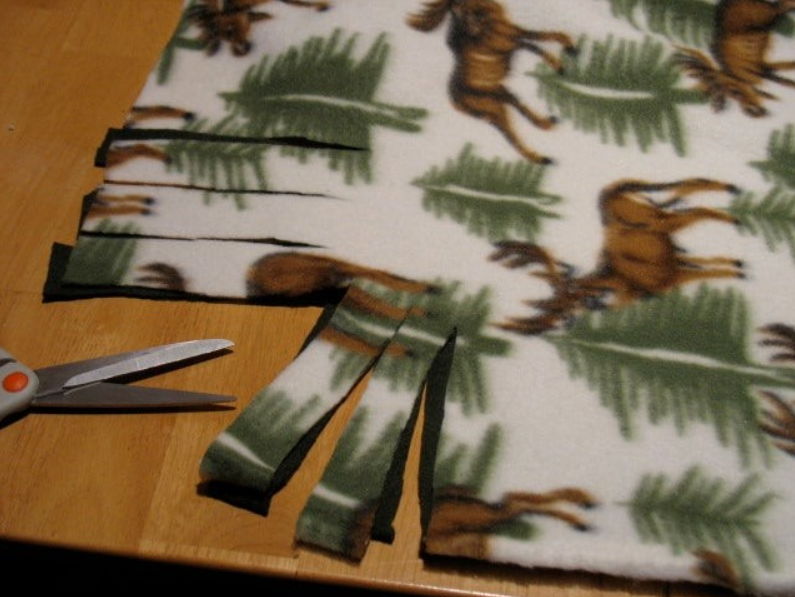
Cut fringe on all four sides of the blanket. Cut through both layers of fabric at the same time. Fringe pieces should be a little wider than the width of two fingers. Cut in from the edge 5 inches. I like to lay a yard-stick across the fabric, 5 inches from the edge so that I know how far in to make my cut.
Step 6: Begin Tying Knots


Leave your blanket laying flat on the surface, with all fringes lined up. I find it easier to start tying from the left and work right, going around the blanket. If you are left-handed, you may find it easier to start on the right and work left. These knots are called balloon knots... tie them just like you would if tying off a balloon! You can also tie a square knot (like you would make doing the first step of tying a shoe lace twice).
Step 7: Continue Around the Blanket
Tie all the fringes together on all four sides of the blanket. You are Finished! Wasn't that easy? All the knots should be snug up to the blanket, but not too tight. The finished blanket should lay flat.
Tip: If your blanket is square (all four sides the same length) you can turn the top so that the stretch goes in the opposite direction of the stretch on the bottom piece. This gives a more stable blanket.